Build a Tweeting Doorbell
A fine way to spend an afternoon

It’s been a while since I’ve made a post of any kind, and especially one related to a project, so here’s something vaguely useful that I’ve recently put together.
Earlier this year, I found myself nearly missing a few deliveries as a result of my doorbell being somewhat difficult to hear from across the house. The bell itself is somewhat hidden in a wall behind a cabinet, so if you’re not in a room that’s directly adjacent to the one with the bell you’ll find that it’s very difficult to hear it.
Thankfully, this is a small problem that can easily be solved through the power of technology. Specifically, by leveraging the open platforms provided to developers by tech companies so desperate for market share that they’re willing to do so at absolutely no cost to the user. For this project, we’ll be using my favorite of these loss-leading social platforms, Twitter.
The Basics
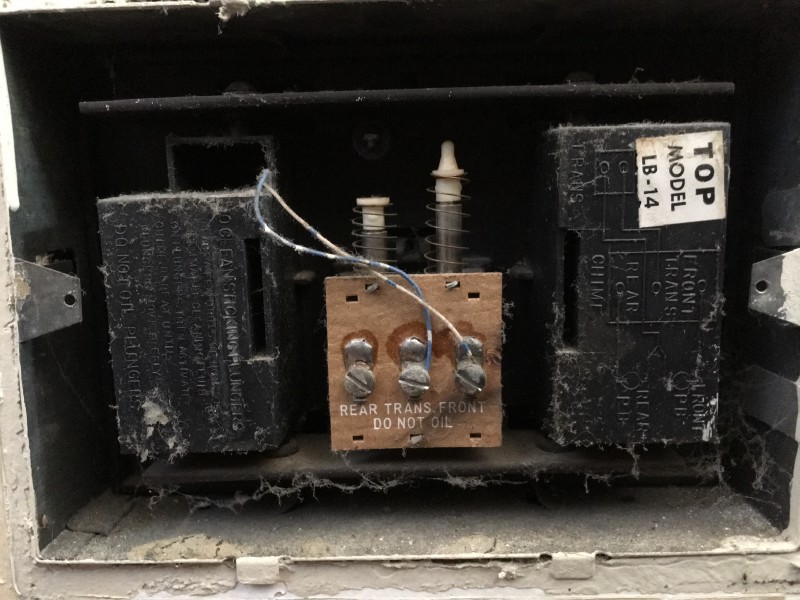
Naturally, the first step in all of this is to determine what kind of environment we’re working in, so I started by popping the wall open to have a look at the ringer circuit, which is simple enough. In my particular situation, pressing the doorbell drives a solenoid which activates the ringer, which is simple enough. This means that we should be able to detect button presses by wiring the control circuit of a relay (rated around 12–24v, most likely) into the exposed terminals.

I ended up ordering a couple of automotive relays, which were rated at 12v and conveniently came in a pack of 2, with sockets.
In this image, the basic wiring is visible: the twisted blue and white pair coming in from the right is wired into the screw terminals on the bell, and connected to the control circuit on the relay. When the relay is “tripped” (e.g. activated) by a current passing through those wires, it causes the NO (normally open) contacts to close, which can be read by the microcontroller attached to the blue and yellow wires coming out of the relay on the lefthand side
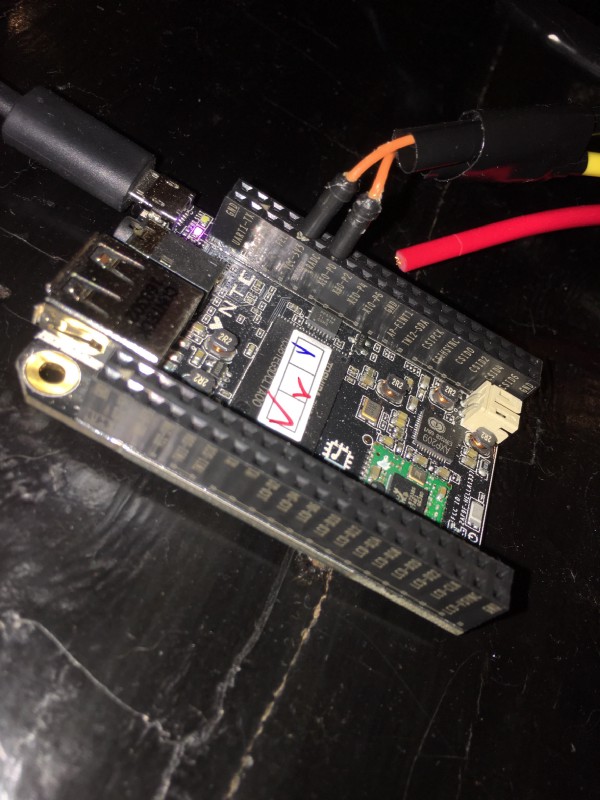
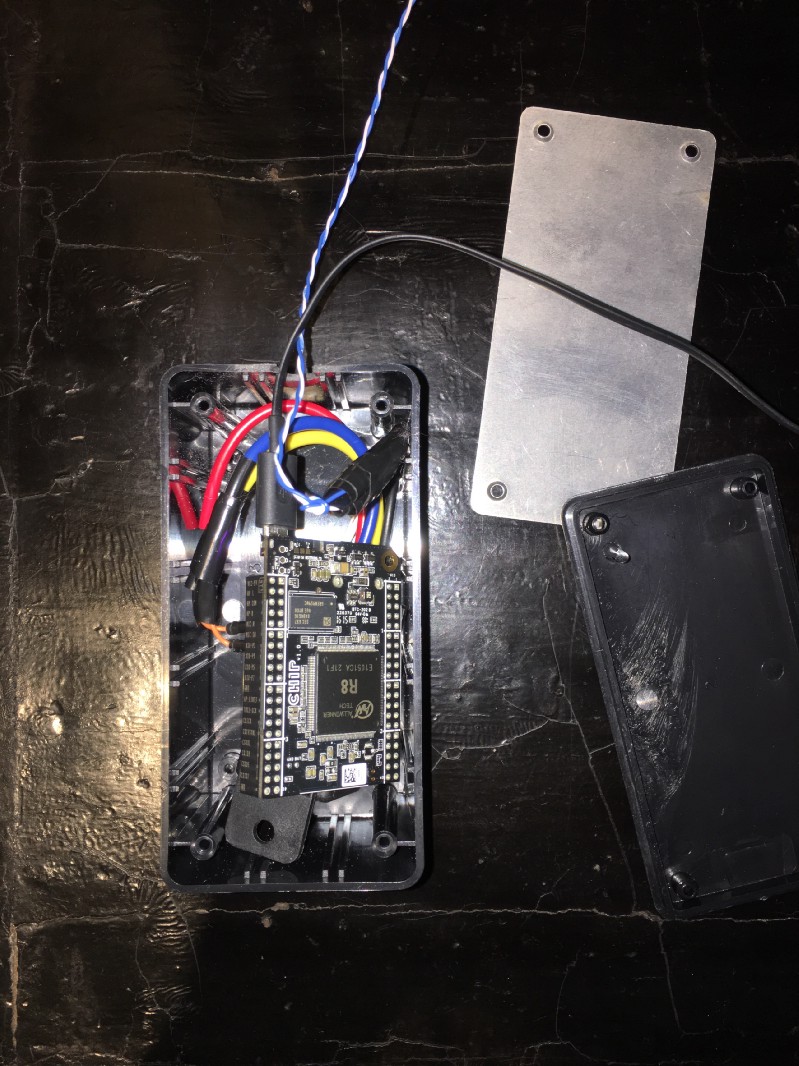
Once the relay is wired up, the next thing you’ll want to do is connect the blue and orange wires to the VCC-3v3 and XIO-P0 pins on the C.H.I.P. It doesn’t matter what order you connect these in whatsoever, you just need to make sure one of each wire goes into one of the respective headers on the board. I’d recommend attaching male jumper pins to the end of each wire to make things easy, and give you a solid connection.
With the wiring done, it’s time to get the software side of things set up. My stack is set up like so:
- 1x Next Thing Co C.H.I.P.
- Node.js with Twit, Johnny-Five and the chip-io plugin (to run the electronics)
- PM2 for process management (to keep the script running)
Setting Up the Environment
The software that actually runs the environment is just as important as the hardware components, and while it’s still fairly straightforward, it’s also more complex. Here’s what you’ll need to do.
I’m assuming that you’re already SSHed into your C.H.I.P. and are currently staring at a nice little shell. If this isn’t you, have a look at this guide.
First, install Node.js. I recommend using the excellent NVM (Node Version Manager) script for this, as it will save you from all the headaches incurred by the often outdated Node packages generally available in the apt repos for most ARM platforms.
Install Node like so:
curl https://raw.githubusercontent.com/creationix/nvm/v0.33.1/install.sh | NVM\_DIR=/usr/local/nvm PROFILE=/etc/bash.bashrc bash

export NVM\_DIR=”/usr/local/nvm” \[ -s “$NVM\_DIR/nvm.sh” \] && \\. “$NVM\_DIR/nvm.sh”
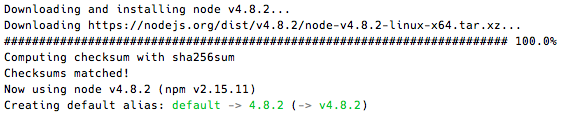
nvm install 4.8.2
Once installation is complete, you’ll want to download the code for this project:
git clone [https://github.com/chtzvt/bellhop.git](https://github.com/chtzvt/bellhop.git) && cd bellhop
Note: if you don’t have Git installed, you can grab a copy with sudo apt-get -y install git. After installation completes, run the above command again.
Next, you’ll want to run the following, which will install the project’s dependencies:
apt-get -y install gcc make curl git python libpython-dev build-essential # this should satisfy all package dependencies
sudo npm i -g --unsafe-perm pm2 johnny-five twit chip-io
npm link johnny-five twit chip-io
After those packages have finished installing, reboot the device. Then you’re ready to move onto the next stage, which is configuring the bot.
Set up Twitter
The next step in this protracted abuse of VC money is to register a Twitter account for your bot. To sign up, click here. I’d recommend making the bot’s twitter private to prevent random netizens from seeing when your doorbell is rung (though that isn’t strictly necessary).
Once your account is ready, the next order of business is to generate a set of API keys. This is another matter of clicking a few buttons, and is a relatively straightforward process:
- Visit https://apps.twitter.com/
- Click the “Create New App” button in the top right corner.
- Fill in the fields for the Application Details section. These can be literally any text, legible, random, or otherwise. After that, click the “Yes, I have read and agree to the Twitter Developer Agreement.” box even though you’ve probably never read the agreement in your life and don’t have any plans to do so.
- Finally, click on the “Keys and Access Tokens” tab. Copy and paste your consumer key and secret into a file, and keep track of which is which. Then, scroll down to the bottom of the page, click “Generate my Access Token”, and do the same as above. Make sure you’re thorough about this because you’re going to need to refer to each of these individually later.
After that, you’ve successfully provisioned your bot’s Twitter API keys and have officially made it through the bulk of the tutorial. Step away from your worktable for an hour or so because you’ve committed a lot of time and energy to this project and are probably getting slightly neurotic at this point.
Use this time to give yourself a pat on the back and grab a stiff drink.
Getting Things Configured
Welcome to the last little bit of setup. The next order of business is to fill out the bot’s configuration. Lucky for you, this is the easiest part.
Start by running the following, from inside of the bellhop directory:
nano ./config.js
Here are the fields you’ll want to fill in with the appropriate information:
Note: If you’re having trouble finding these, you can use ctrl+W to search.
- BOT_NAME: The username of your bot
- TWITTER_URL: The URL of your bot’s profile (optional)
- consumer_key, consumer_secret, access_token, access_token_secret: Fill these in with the API key information you got from Twitter earlier (copy and paste is generally a good idea here)
- pin: Should be
'XIO-P0'instead ofnull. - AUTHORIZED_USERS: Remove my username from this array, and replace it with yours. You can also add entries to the array to have the bot notify those people, as well. For best results, make sure everyone the bot is trying to notify is following the bot’s Twitter account. For example,
['yourusername','someoneelse','yet_another_account']etc.
You also have the option of making a few other tweaks, as well:
- debounceTime: By default, the bot will wait for at least 2 minutes between doorbell presses before sending you another notification. This is because people typically ring the doorbell a few times, and I don’t want to get a deluge of tweets from an impatient pizza deliveryperson, or something. This is measured in seconds, so you can increase or decrease it to your liking.
- responses: This is an array of responses that the bot randomly picks from whenever the doorbell is rung. If you want to get a different set of custom messages whenever you hit the bell, you can put your own responses into that array, like so:
['FBI- Open up!','Dong dong! They\'re probably solicitors, don\'t get your hopes up','Come get the door, you inattentive ass']
Once you’ve edited config.js to taste, ctrl+o and ctrl+x to exit.
Testing
No project is done without a little testing. Try running the following in the bellhop folder:
sudo node main.js
If your shell sits quietly and does nothing, that’s good! It means the bot is running without issues. Check the bot’s timeline for a status message, like this one:

If you can see this, that means that the Twitter API keys are valid and everything is functioning properly software-wise. Try ringing your doorbell to see if it sends you a tweet.
Did something go wrong?
First, try rebooting. This reloads everything and fixes most types of weird, one-off errors.
Second, Double check your wiring. If you rang the bell and the script didn’t crash or log any errors, then some electrons probably aren’t flowing the right way. Run the script and temporarily stick a paperclip into VCC-3v3 and XIO-P0 to simulate the relay closing.
If the script is crashing, have a look at the error:
- If it says something about a syntax error in config.js, you probably misplaced a
,,;,", or'somewhere. You can copy and paste config.js into JSHint to get a better idea of where syntax errors might exist. - If you’re getting an error that says something vague about Twitter and authentication, your API keys are probably not in there right.
- If a module isn’t loading, try installing and linking those modules again.
Did none of the above work for you? If that’s the case, feel free to scour StackOverflow at 3 in the morning (or send me a DM if you’re totally stumped).
Now, run it persistently
Assuming everything is properly functional, you can run a few short commands to have the script run automatically in the background, forever.
Ctrl+C out of the bot, if you’re still running it, and make sure you’re still in the bellhop folder. Then, run the following:
sudo pm2 startup # Starts the PM2 service whenever the system boots
pm2 add main.js # Tells PM2 to manage the bot's processs
pm2 save
With that, the project is complete. Test that this is working by rebooting the system, leaving it alone, and watching Twitter to see whether it posts another status message.
Cheers!